> For the complete documentation index, see [llms.txt](https://wiki.lilacmc.net/llms.txt). Markdown versions of documentation pages are available by appending `.md` to page URLs; this page is available as [Markdown](https://wiki.lilacmc.net/other-guides/making-vanilla-map-art.md).
# Making vanilla map art
### VANILLA MAP ART GUIDE
Written by: P1ng
> **SO WHAT IS MAPART?**
\
Not to be confused with ArtMap, mapart allows players to create a canvas on 128x128 block area. One of the coolest things that you can do with Mapart is that you can bring any (appropriate) image that you find online into **LilacMC**!
> **1.0 HOW TO INSTALL FABRIC AND LITEMATICA!**
One of the most important things that you need for making mapart is Litematica.\
\
Litematica is a Fabric mod and is used to render in your mapart! There are two ways that you can install Fabric and that's through the clean install on OR you can use the Essential client where Fabric will be installed for you for what version you desire! If you would like the easy way I highly recommend going to and following the instructions after clicking download. When using the Essential client route please make sure that the version that you download is for Fabric and not Forge. One of the great things about Essential is that it works for both MacOS and Windows.
> **1.1 INSTALLING FABRIC FOR WINDOWS**
If you have decided to go with the Essential Client method I would skip this section and go to **Section 2** since it might cause some confusion. If you are installing Fabric for Mac proceed to **Section 1.2**.
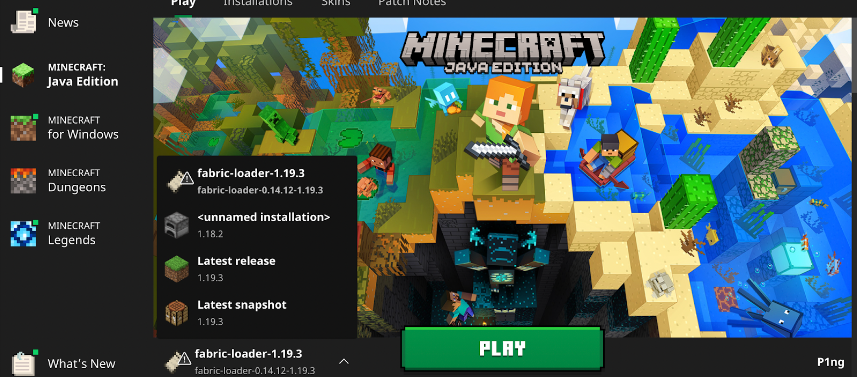
To install Fabric for Windows you would first want to head to and click the button to “Download for Windows.” After downloading this .EXE file run it and you will be prompted with a window to install the client for the latest released version of Minecraft. Since we are installing Fabric for ourselves make sure that the tab is on “Client” and the correct version of Minecraft that you desire is installed. I would also make sure that your “Loader Version” is on the **most recent update** before installing. For the “Select Install Location” it should end in your “.minecraft” folder. If done correctly this is what it should look like:
**PLEASE NOTE: THIS GUIDE WAS WRITTEN WHEN THE LATEST UPDATE WAS 1.19.3. VERSIONS MIGHT OF CHANGED IN THE FUTURE.**
After you have clicked “Install” you will see a window that will confirm that the version that was inputted and loader version were installed. Your Minecraft Launcher should have a profile with the Fabric logo with the Version that you installed. It is recommended that you launch the game to make sure that everything works. The next steps are in **Section 2**.
> **1.2 HOW TO INSTALLED FABRIC FOR MACOS**
If you have decided to go with the Essential Client method I would skip this section and go to **Section 2** since it might cause some confusion. If you are installing Fabric for Windows please go back to **Section 1.1**.
Installing Fabric for MacOS is a little bit more complex than Windows but is a lot easier with Essential. If you would still like to do a clean installation go to and download the **universal** **jar** file. After installing the file and you attempt to open it MacOS will stop you from opening it.\
\
Proceed to go to your settings and click on “Security & Privacy” where in the “General” tab you should see the Fabric Installer application being attempted to be opened.
After you open the installer there will be a java icon on your dock and when opened you will get a window where you can change the Minecraft Version and “Loader Version.” I wouldn’t recommend changing anything before doing anything unless you know what you are doing. If you would like to install an older version of minecraft you can change it with the “Minecraft Version” tab. When you are ready just hit the “Install” button and a new profile will be created in your Minecraft Launcher.
\
When you launch your Minecraft Launcher you should see a brand new installation with the fabric logo. It is recommended to launch your game to make sure that everything works.
> **2 INSTALLING LITEMATICA (AND OTHER DEPENDENT MODS)**
When using Fabric one of the first things you need to download is the Fabric API.\
\
Fabric API is a library mod for the Fabric. To install the API if you visit and install the correct version file. That means if you installed the 1.19.2 Minecraft Version in the Fabric Installer then you would want to install the latest version of the Fabric API on Curse Forge. I would recommend installing the API file on your desktop or a file locaiton so that you can have easy access to it.
Another library mod that is required is MaLiLib. To install the mod you can download the file from and make sure that you have the correct game version when installing!
For the final mod you need to install the actual Litematica mod. To install you would need to follow the same steps following this link: and make sure that you download the same game version file as your Fabric or it won’t work!
**2.1 Adding Litematica to your Minecraft folder on Windows**
The easiest way that you can open your %Appdata% folder on Windows is by right clicking your start button, should be the windows button, and clicking the “Run.”\
\
You should be prompted with a window and all that is needed is to type “%Appdata%” and hit “OK.”
After you hit ok you should be prompted with a folder with a “.minecraft” at the top of the list. After you open this file you should see a ton of files but all that is needed is your “mods” folder. All you have to do now is drag the three files into the mods folder. If you do not see a mods folder launch Minecraft with the Fabric and after the game has fully opened just close it and look for your mods folder and just add the three files into the folder. Launch your game after and make sure that everything works!
If you are using Essential after you open your “.minecraft” folder there should be a folder called “essential \[Game\_Version.]” In the folder you should see a “mods” folder in there with a file called “Essential” already in there. All that is needed is to have you add the three files into that folder.
> **2.2 ADDING LITEMATICA TO YOUR MINECRAFT FOLDER ON MACOS**
Installing the mods on MacOS are a little more confusing than Windows but still possible. The first step is to open up your Finder app which displays all your folders and hit “Shift + Command + G” and you will be prompted with a search window that asks you to go to a certain folder. In this search tab you would want to type “**\~/Library/Application Support**” and hit enter. You might have to search for a bit but open your “Minecraft” folder. After opening this folder there should be a “mods” folder. If there isn’t a “mods” folder just open your Minecraft Launcher and run the profile with Fabric and close it after launching and it should be there. You then want to get your three files and drag and drop the files into the folder. Launch your game after to make sure everything works!
If you are using Essential on MacOS instead of looking for your “mods” folder there should be a folder called “essential \[Game Version.]” In the folder you should see a “mods” folder in there with a file called “Essential” already in there. All that is needed is to have you add the three files into that folder.
> **3 CREATING THE RENDER**
The website thats used to create the render is going to be . With this website you can create renders of images of your choosing for your mapart. You can upload the image that you would like to upload by just clicking the “Pick Image” box and uploading the image that you would like. The image will be turned into a 128x128 pixels.
\
Once you have your image uploaded you can start selecting your blocks that you would like to use. If you want to use the best blocks I recommending using this preset: . This preset uses almost all naturally obtainable blocks and removes some of the harder ones to get. You can choose to add blocks or removing them by clicking the barrier block in the row. After selecting all the blocks that you would like your preview window may look a little different.
For the settings on the right most of them do not to be changed except for one. Staircasing is something that allows the blocks in your mapart have 3 different colors and have a nicer color selection but it is a lot harder to build without /fly and even harder to take down to get your materials back. The add blocks under are for blocks that cannot be supported by themselves like the pressure plates. If you have an area already planned out for your mapart I would recommend just turning this off OR changing the “Blocks to add” to something different than the blocks that were selected on the left list. The other settings are there to just edit the colors of the image and this can change which blocks are required. I wouldn’t recommend these settings UNLESS you know what you are doing. The map size setting changes how big you want the map. This can add more detail but will make the map bigger and require more blocks. It is recommended to start off creating 1x1’s.
After you select the blocks that you would want all that is needed is to click the “Download as NBT.”
> **4 USING LITEMATICA TO CREATE YOUR MAP**
After creating the render for your mapart you would need to open your \`\`.minecraft” folder again if you closed it. A new folder should of appeared called “schematics.” Just drop your file that you received from the render website in this folder and launch your game. You can actually edit this folder while in game so you don’t have to restart or close your game when adding and deleting schematics. I would recommend starting a new creative superflat and pressing your “M” key to make sure that you have the mods installed and working. If it is working you should get a menu like this.
If not, go back and make sure that the versions of the mods you have installed are correct.
If you get the menu click the “Load Schematics” tab and there should be a green “V” symbol followed by the name of the file that was saved.
To load the file all you have to do is click the name and then load schematic on the bottom left corner. Now to learn how to place render correctly you want to first get an empty map and open it. The best position for this would be an ocean or a giant flat area. After you load an area you should see yourself as a little white arrow.
Now press “F3+G” to open up chunk borders. If done correctly there should be a yellow wireframe in a 16 block by 16 block square. Following these borders to the top left one of the map. If done correctly the border and map should look like this.
The white concrete block is a block that is inside the map still and inside the chunk border while the black concrete block is outside the map. To properly load the map you would want to stand on the black concrete block and load the schematic.
If done correctly the line of cobblestone should be at the top and outside the map. If done incorrectly your mapart will be made incorrectly with a giant ugly line.
If you have placed your render properly with the cobblestone wall a block over the chunk border line your map art should have the full render as shown below.
If you want to move around your schematic all you have to do is just open the Litematic menu and go to schematic placements. Then click on the “configure” and open a big menu with a ton of options. On the right hand side you will see the placement of origin.
The hotkey for this menu is the numpad “-.” If you would like to change the hotkey you can press “M+C” and click the “Hotkeys” tab and change it with the “open GuiPlacementSettings.”
The placement origin is extremely useful for moving around the render. You can either type the coords of where you would like the render or use your scroll wheel on the plus and minus button. The white box right next to the buttons you can use to lock the cords so that you can’t accidently move the render if changing the coords.
If you may have noticed you can see that the render is just floating in the air and is very hard to reach for. The best way you can bring it down is by just opening up the GUI placement settings and just move the Y level down by 2 or how many it is for the render to touch the ground.
Now that your map is loaded correctly one very important step is to go to your GUI placement menu and click on “Material List.” If you have your render distance high enough you should see a list of blocks that are needed for your mapart. If you do not have a high render distance your list should just be empty like below and all you have to do is press “Refresh” at the top left corner.
When you exit this menu you should see at the bottom right of the screen what chunks are needed for you to render to get the complete material list.
After you load these chunks you can open your materials list again you should get an entire list of what is needed to build your mapart.
Another way to look at the list is to use the “M+V” which opens the verification tab. It looks about the same with a bit more information. After you press “Start Verification,” you may need to render some chunks, you should get a complete list that looks somewhat like below.
This list shows the wrong blocks, wrong states of block (like rotations, and if blocks are waterlogged or not), and missing blocks. The “Extra Blocks” tab has been known to just confuse players since its all the blocks below the actual render. If you click on a “Missing Block” all the missing blocks will pop up with a blue outline that will make it easier to know where to place certain blocks. Below I have selected “Warped Wart Blocks” and you can see that the Warped Wart Blocks are highlighted and brighter than other blocks. This feature is extremely useful for finding blocks that you have missed or blocks that aren’t supposed to be in the render.\
\
All you need now is just to gather the material and start placing the blocks required for your render. When you are completed with your render you 100% should make an extra map of the area and put it into a cartography table with a glass pane to “lock” the mapart and stop it from getting changed/updated. If you would like to make copies of the map you would need to make empty maps with the locked map together in the inventory and you can make as many copies as you have empty maps and sell them to others!


